This lesson uses: Arduino UNO R3 board, TinkerBlock TK85 Matrix Keypad I2C Adapter module, jumper wires (or breadboard). Use Wire library to scan the matrix keypad over I2C; outcome: when you press a key, serial prints the character (0–9, A–D, *, #).
1. Wiring
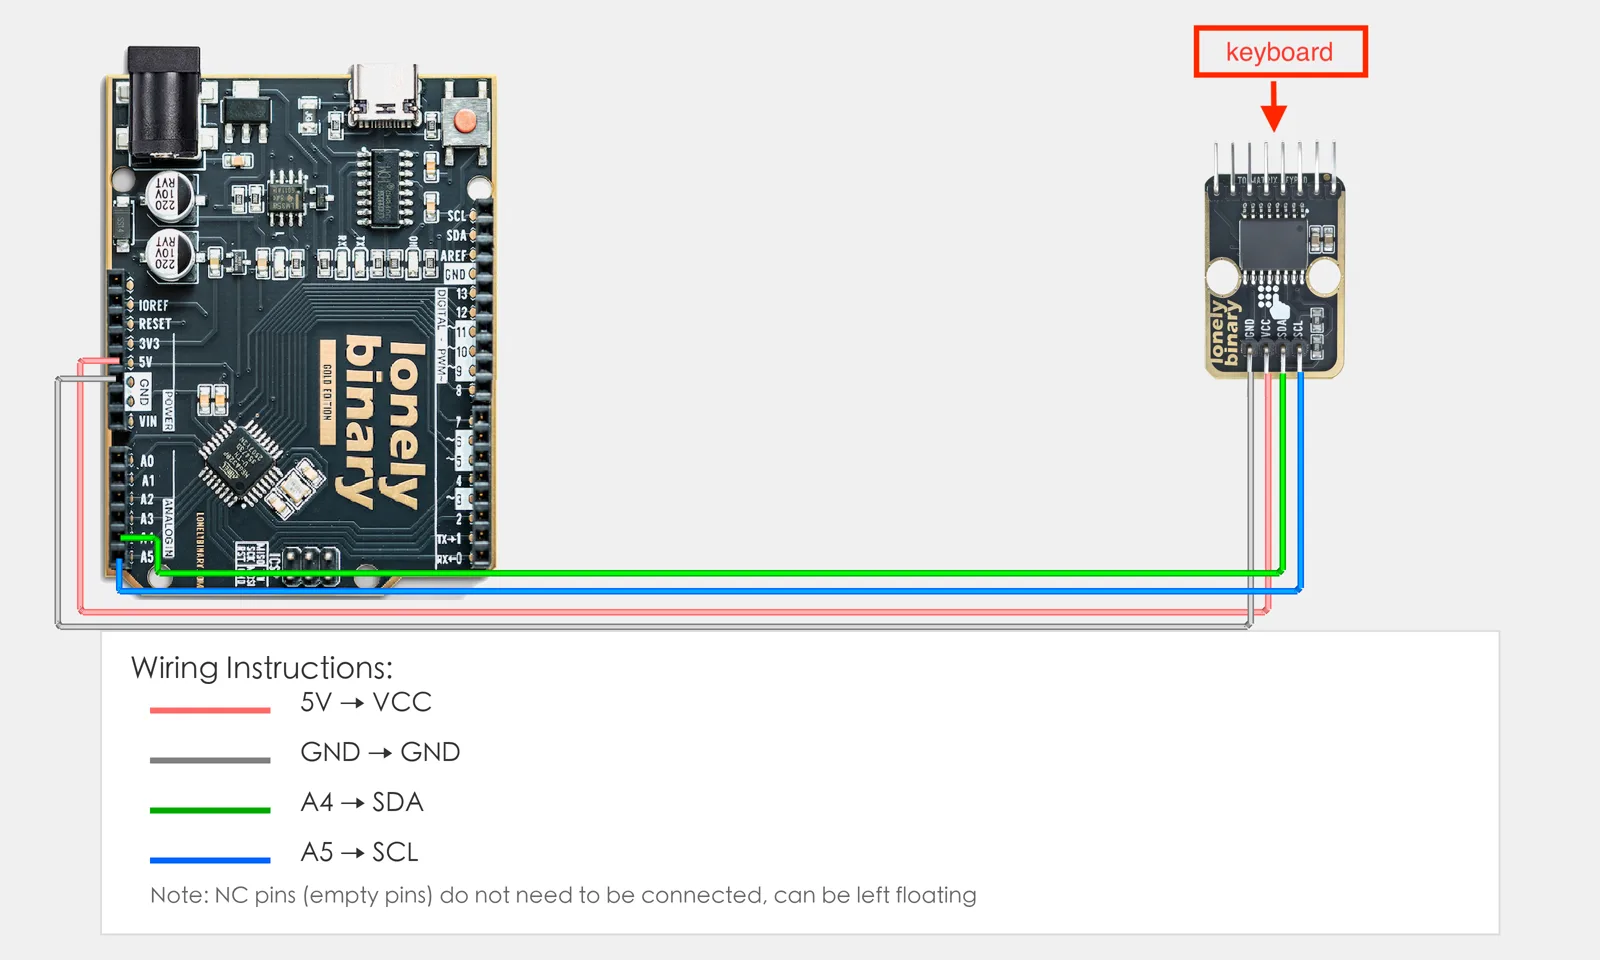
Connect TK85 Matrix Keypad I2C Adapter to Arduino (I2C):
- GND → Arduino GND
- VCC → Arduino 5V
- SDA → Arduino A4 (I2C data)
- SCL → Arduino A5 (I2C clock)
- NC leave unconnected
2. New sketch
- Arduino IDE: File → New (or Ctrl/Cmd + N) to create a blank sketch
- Confirm board and port are selected (same as Lesson 01)
- Type the code below into the default
setup()andloop()yourself
3. Program structure
Same as last lesson: two fixed blocks setup() and loop().
setup(): Include library, start I2C, start serial; runs once.loop(): Keep repeating “scan keypad → detect key → print to serial → wait → repeat”.
I2C connects the keypad; press a key and serial shows the character.
4. Code to write
Type the code below at the top of the file and in setup() and loop() (do not copy-paste; typing it yourself helps you remember):
// I2C scan 4×4 matrix keypad: PCF8574 selects column, read rows for key index, then lookup char
#include <Wire.h>

#define KEYPAD_ADDRESS 0x20   // PCF8574 I2C address

char keymap[16] = "DCBA#9630852*741";   // Key index 0-15 → character

void setup() {
  Wire.begin();   // I2C init
  Serial.begin(9600);
  Serial.println("I2C matrix keypad started");
}

void loop() {
  int key = readKeypad();   // Scan; returns 0-15 or -1
  if (key >= 0 && key < 16) {
    Serial.print("Key: ");
    Serial.println(keymap[key]);
  }
  delay(100);   // Scan interval and debounce
}

// Drive each column low, read rows; low row = key pressed, return 0-15, else -1
int readKeypad() {
  for (int col = 0; col < 4; col++) {
    Wire.beginTransmission(KEYPAD_ADDRESS);
    Wire.write(0xFF & ~(1 << (4 + col)));   // Select column col
    Wire.endTransmission();
    delayMicroseconds(200);
    Wire.requestFrom(KEYPAD_ADDRESS, 1);
    if (Wire.available()) {
      int rowData = Wire.read();
      for (int row = 0; row < 4; row++) {
        if (!(rowData & (1 << row)))
          return row * 4 + col;
      }
    }
  }
  return -1;
}
Program notes
Overall idea: TK85 uses PCF8574 for 4×4 matrix; columns are PCF outputs, rows are PCF inputs. Drive one column low at a time, read rows; a low row means that row×column key is pressed, index row*4+col. Map index to character with keymap[] and print.
| Code | In this lesson |
|---|---|
Wire.write(0xFF & ~(1 << (4+col))) | Select column col (PCF high 4 bits = columns, low 4 = rows) |
Wire.requestFrom(..., 1) | Read 1 byte; bits show which rows are low (pressed) |
row * 4 + col | Key index 0–15 for keymap |
keymap[key] | Index → character (layout depends on hardware) |
5. Hands-on
- After entering the code, click Verify (✓) to compile
- Click Upload (→) to upload to the board
- Open Serial Monitor (Tools → Serial Monitor, baud 9600)
- Press keys: serial shows the corresponding character
- Try different keys and watch the output
Expected result:
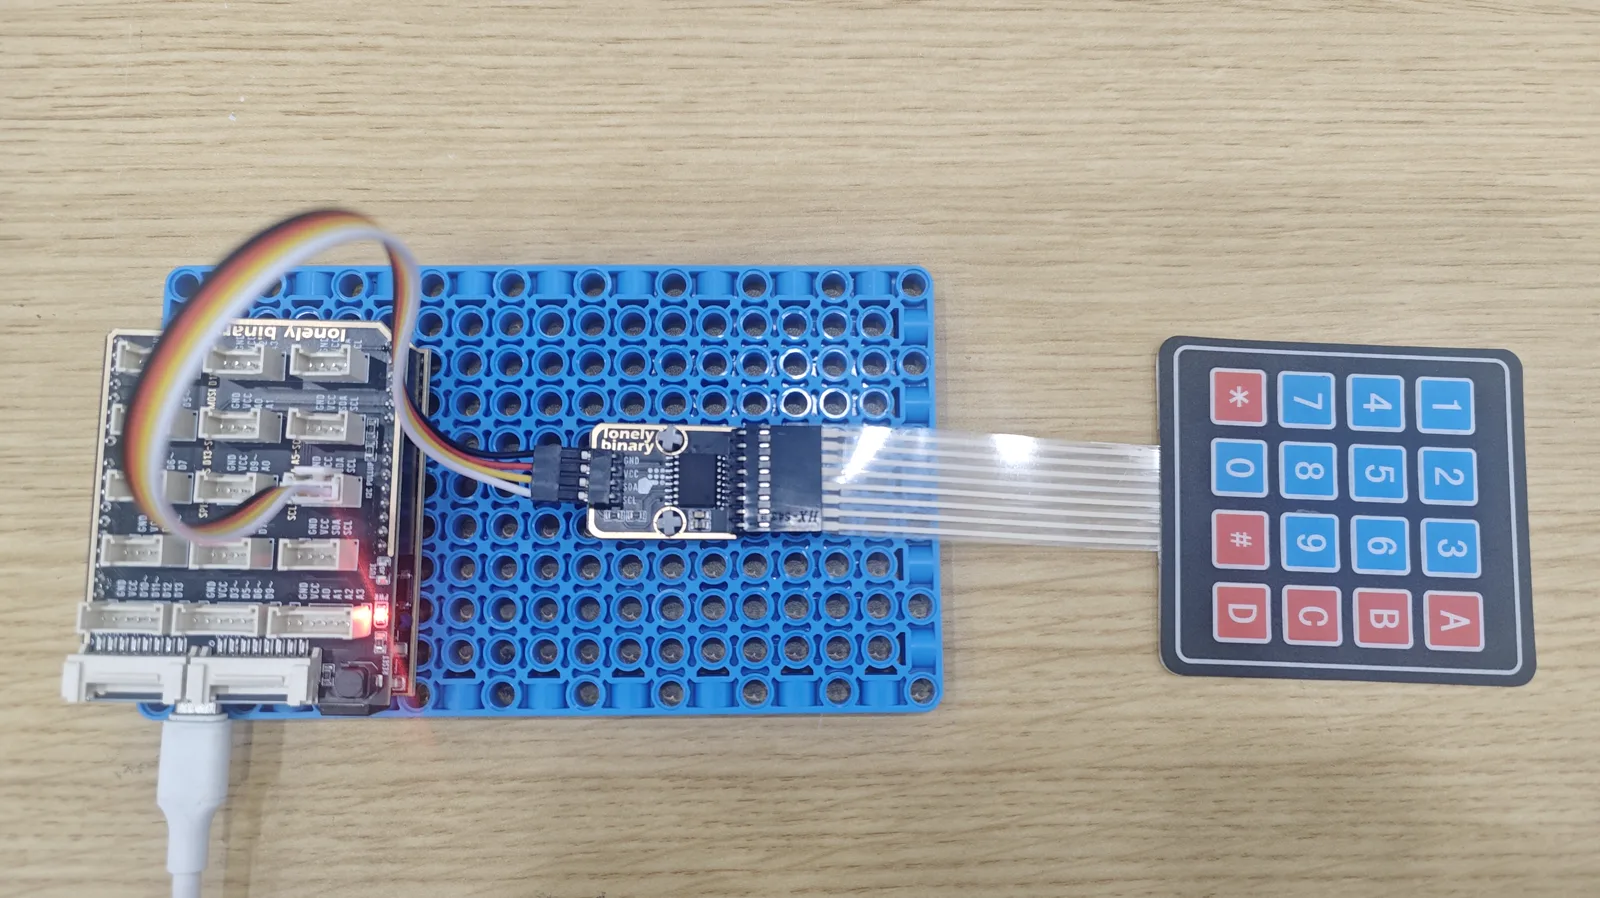
Serial monitor:
I2C matrix keypad started
Key: 1
Key: 2
Key: 3
...
Proceed to Lesson 33.
Edit this page — content/guides/tinkerblock-workshop/32-i2c-matrix-keypad.mdx
Questions about this product
See what other owners have asked, and read their solutions.
Matrix Keypad (I2C)
Loading discussions…
Discuss this article
Ask about this page. The answer stays here, on the page it belongs to, for whoever hits the same wall next.