
The UNO R3
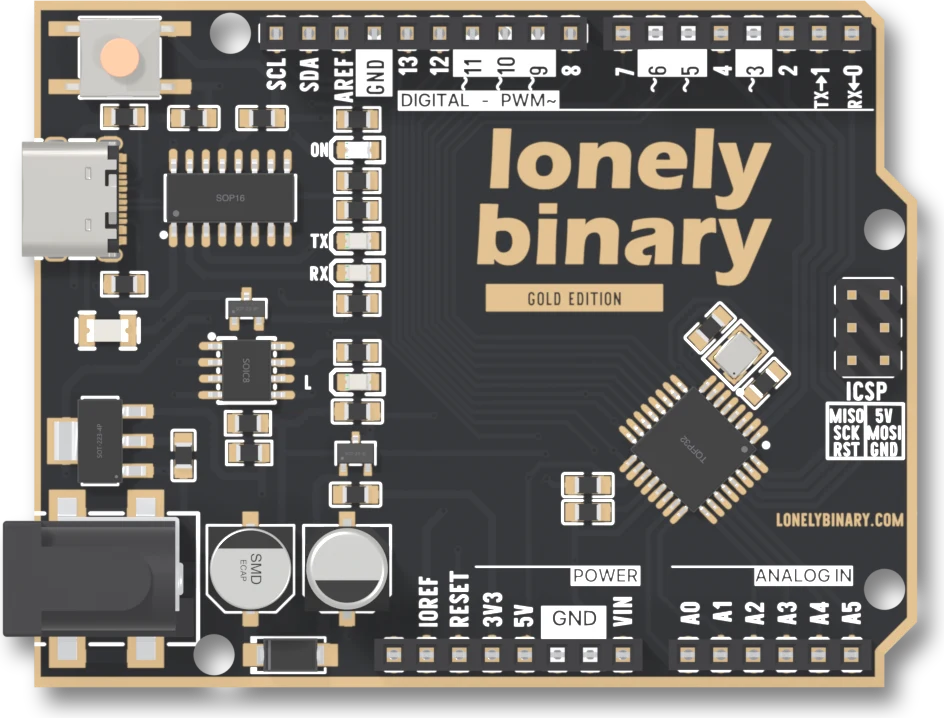
An ATmega328P at 16 MHz with 32 KB of flash, 2 KB of RAM and 1 KB of EEPROM, a CH340C that turns USB-C into its serial port, and the UNO R3's four strips of holes in the places every Uno shield expects them.
One board, three boxes
The UNO R3 USB-C is sold as the Black Gold Edition (black solder mask, gold ENIG plating), as a three-pack of the same, and as Sakura Pink (pink solder mask, immersion silver). They are one circuit. The pink box and the three-pack come with a USB-C cable; the single Black Gold board does not, so you need one that carries data.
The chip
The board is built around an ATmega328P, an 8-bit microcontroller from Microchip, running at 16 MHz from a crystal beside it. It holds three kinds of memory, and each part of a sketch's life ends up in a different one.
The bars are to one scale, and the scale is the lesson. The program goes into 32 KB of flash, and keeps it with the power off. Its variables live in 2 KB of SRAM, which is sixteen times smaller and is wiped at every start. EEPROM is 1 KB that survives both, for the few values a sketch must remember. The last 512 bytes of flash hold the bootloader, which is why the IDE reports 32256 bytes for sketches and not 32768.
There is no USB inside the ATmega328P. A second chip, the CH340C, sits by the USB-C socket and turns USB into the chip's serial line on pins 0 and 1. Uploads and the Serial Monitor both travel that way, and it is why the computer may need a driver.
The chip runs Arduino C++. MicroPython does not run on it: it needs far more memory than 2 KB of RAM.
What "UNO-compatible" means
Arduino's own Uno R3 uses the same ATmega328P and a different USB chip, an ATmega16U2, behind a USB-B socket. This board keeps the parts a shield or a sketch can see:
- The holes are where a Uno's are. Four strips, the same spacing, the same order, including the R3 additions: SDA and SCL beside AREF, and IOREF beside RESET. A shield made for the Uno plugs straight in.
- The pins work the same. Pin 13 is the L lamp, 3, 5, 6, 9, 10 and 11 do PWM, A4 and A5 are I2C, 10 to 13 are SPI. A sketch written for a Uno runs unchanged, and a library that says it supports the Uno supports this.
- The IDE treats it as an Arduino Uno. You choose that board in the Tools menu and the upload uses the same bootloader and speed.
What differs is the USB side: a USB-C socket, the CH340C in place of the 16U2, and a port the IDE does not recognise by name. Everything after the USB chip is the Uno you will read about in other people's tutorials.
Its own power
The board runs from the USB-C socket, or from 7 to 12 V on the barrel jack, and switches to the jack by itself when one is plugged in. The ON lamp says the 5 V rail is up; the tour goes through the parts that do the switching.
When it does not work
The Sakura Pink board and the Black Gold Edition are the same circuit with a different solder mask and plating. Every pin, lamp, part and number in this book applies to both.
The port belongs to the CH340C, not to an Arduino-made USB chip, so the IDE cannot tell which board is behind it. Choose Arduino Uno yourself under Tools, Board. The board and port article shows the two rows.
Fitting the holes is the mechanical half. Check that the shield runs at 5 V, which is what this board's pins and IOREF carry, and that it does not need the same pins as something else you have plugged in, such as A4 and A5 for I2C.
That is expected. The sketch lives in flash, which keeps it with the power off, so any 5 V USB supply starts the last sketch you uploaded.
Every part on the top face, where it sits, what it does, and what it looks like when it goes wrong.
A tour of the board →Edit this page — content/books/uno/the-uno-r3.mdx
Questions about this product
See what other owners have asked, and read their solutions.
UNO R3 USB-C (ATmega328P)
Loading discussions…
Discuss this article
Ask about this page. The answer stays here, on the page it belongs to, for whoever hits the same wall next.