What is in the box
One board with every connector on it, four boards with none, and the parts that plug into them. What each piece is for, and the three things the box does not include.
The box
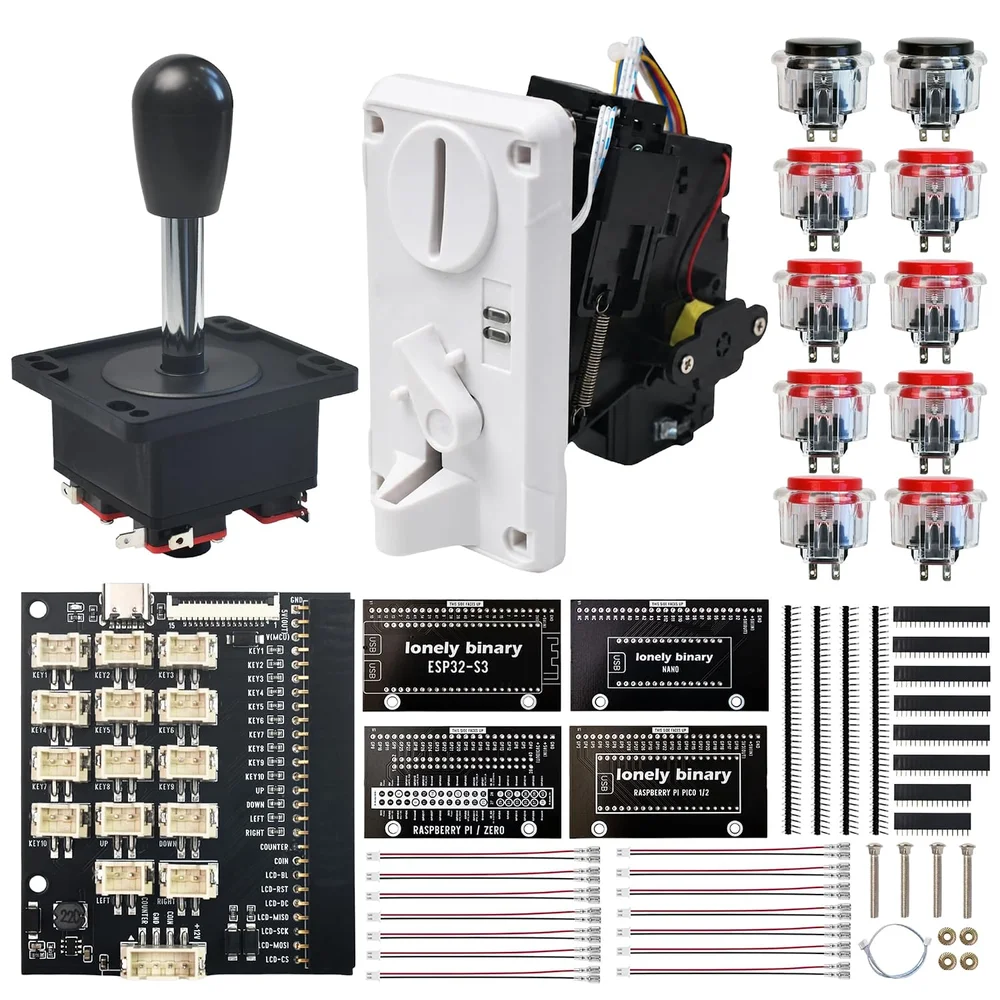
- 1 mainboard. Every connector is on it.
- 4 adapters, one each for an ESP32-S3, a classic Arduino Nano, a Raspberry Pi Pico or Pico 2, and a Raspberry Pi Zero 2 W.
- 1 joystick with four microswitches, and 10 buttons, 8 red and 2 black.
- 14 two-wire cables, one per button and one per joystick switch.
- 1 coin acceptor and its four-wire cable.
- 4 sets of mounting screws, and pin headers for the adapters.
The mainboard
The mainboard does two jobs. It collects fourteen switches, a coin acceptor and a screen socket onto one 26-pin header, and it turns 5 V from its USB-C socket into the roughly 12 V the coin acceptor runs on.
It has no processor. It does not know which adapter is plugged in, and it does not need to: every job sits at the same header position on every adapter.
What you add
- A development board that matches one of the adapters.
- A USB data cable for that board. Some cables only charge; if your computer never sees the board, try another cable before anything else.
- A 5 V USB-C supply, 2 A or more, for the mainboard. It powers the coin acceptor, which is the one thing in the kit that draws real current.
A screen is optional and sold separately. See Add a screen.
When it does not work
Solder them before you use the adapter. A development board resting on unsoldered pins makes contact on some of them some of the time, and the symptom is a button that works when you lean on the board. Solder one pin at each end first, check the strip sits square, then do the rest.
Each one prints its board's name in large letters: ESP32-S3, NANO, RASPBERRY PI PICO 1/2, RASPBERRY PI / ZERO. The pin names down the edge are that board's own names, so the ESP32-S3 adapter reads 4, 5, 6, 7 and the Pico adapter reads GP16, GP17, GP18.
That socket is for power only. It has no data contacts, so a computer cannot see the kit through it. Programs go into the development board through its own USB socket; see Two USB sockets.
Which adapter your board needs, and where each of the 26 positions lands on it.
One header, four adapters →Edit this page — content/books/arcade/what-is-in-the-box.mdx
Questions about this product
See what other owners have asked, and read their solutions.
HotSwap Arcade Kit: Buttons, Joystick and Coin Acceptor for ESP32-S3, Nano, Pico and Zero 2 W
Loading discussions…
Discuss this article
Ask about this page. The answer stays here, on the page it belongs to, for whoever hits the same wall next.