Arduino IDE, set up for N16R8
Install the IDE, add one URL, install one package, then set eight rows in the Tools menu. Three of those eight decide whether this board behaves like the N16R8 you bought or like a smaller one.
Install the IDE and the board package
-
Download Arduino IDE 2.x from arduino.cc and install it the way your operating system expects.
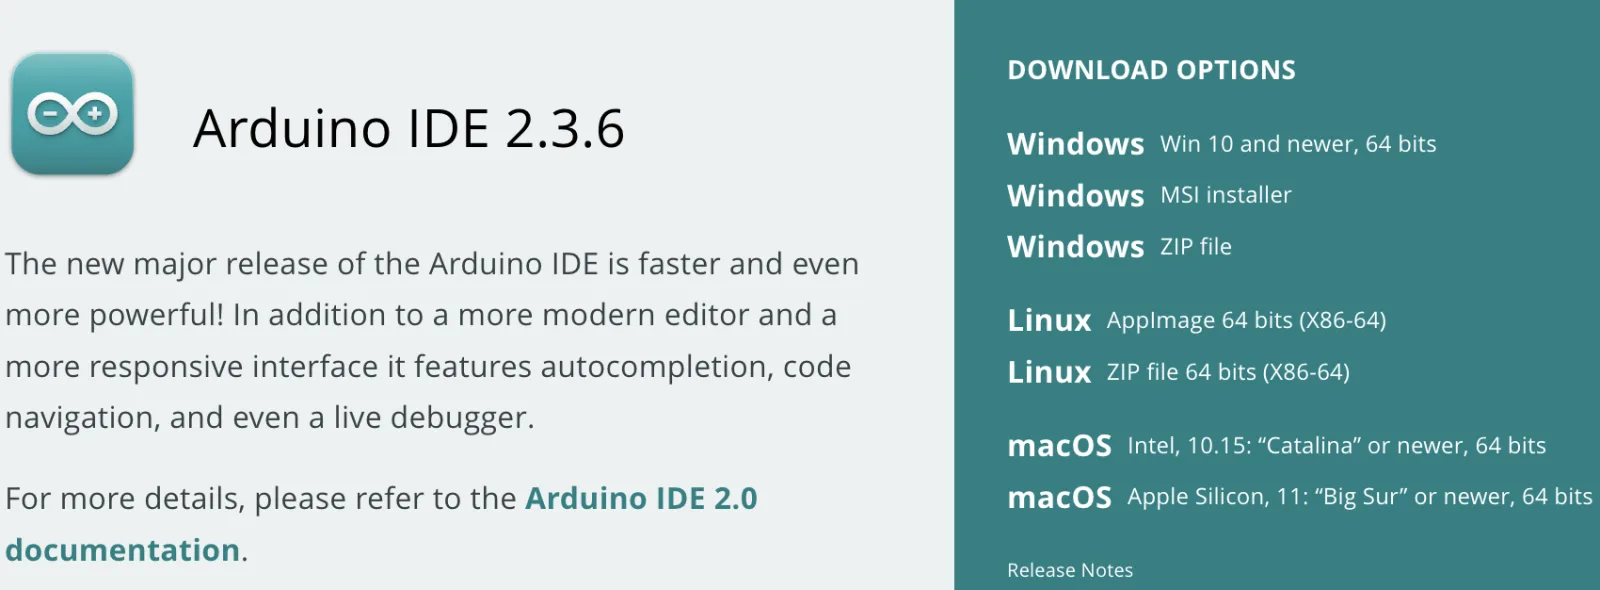
macOS is two separate downloads and the page does not choose for you — Apple Silicon or Intel, and an Apple Silicon Mac given the Intel build asks to install Rosetta before it will start. The version number moves; anything 2.x is what this book assumes. -
Open File ▸ Preferences (Arduino IDE ▸ Settings on a Mac) and paste this into Additional boards manager URLs:
https://raw.githubusercontent.com/espressif/arduino-esp32/gh-pages/package_esp32_index.json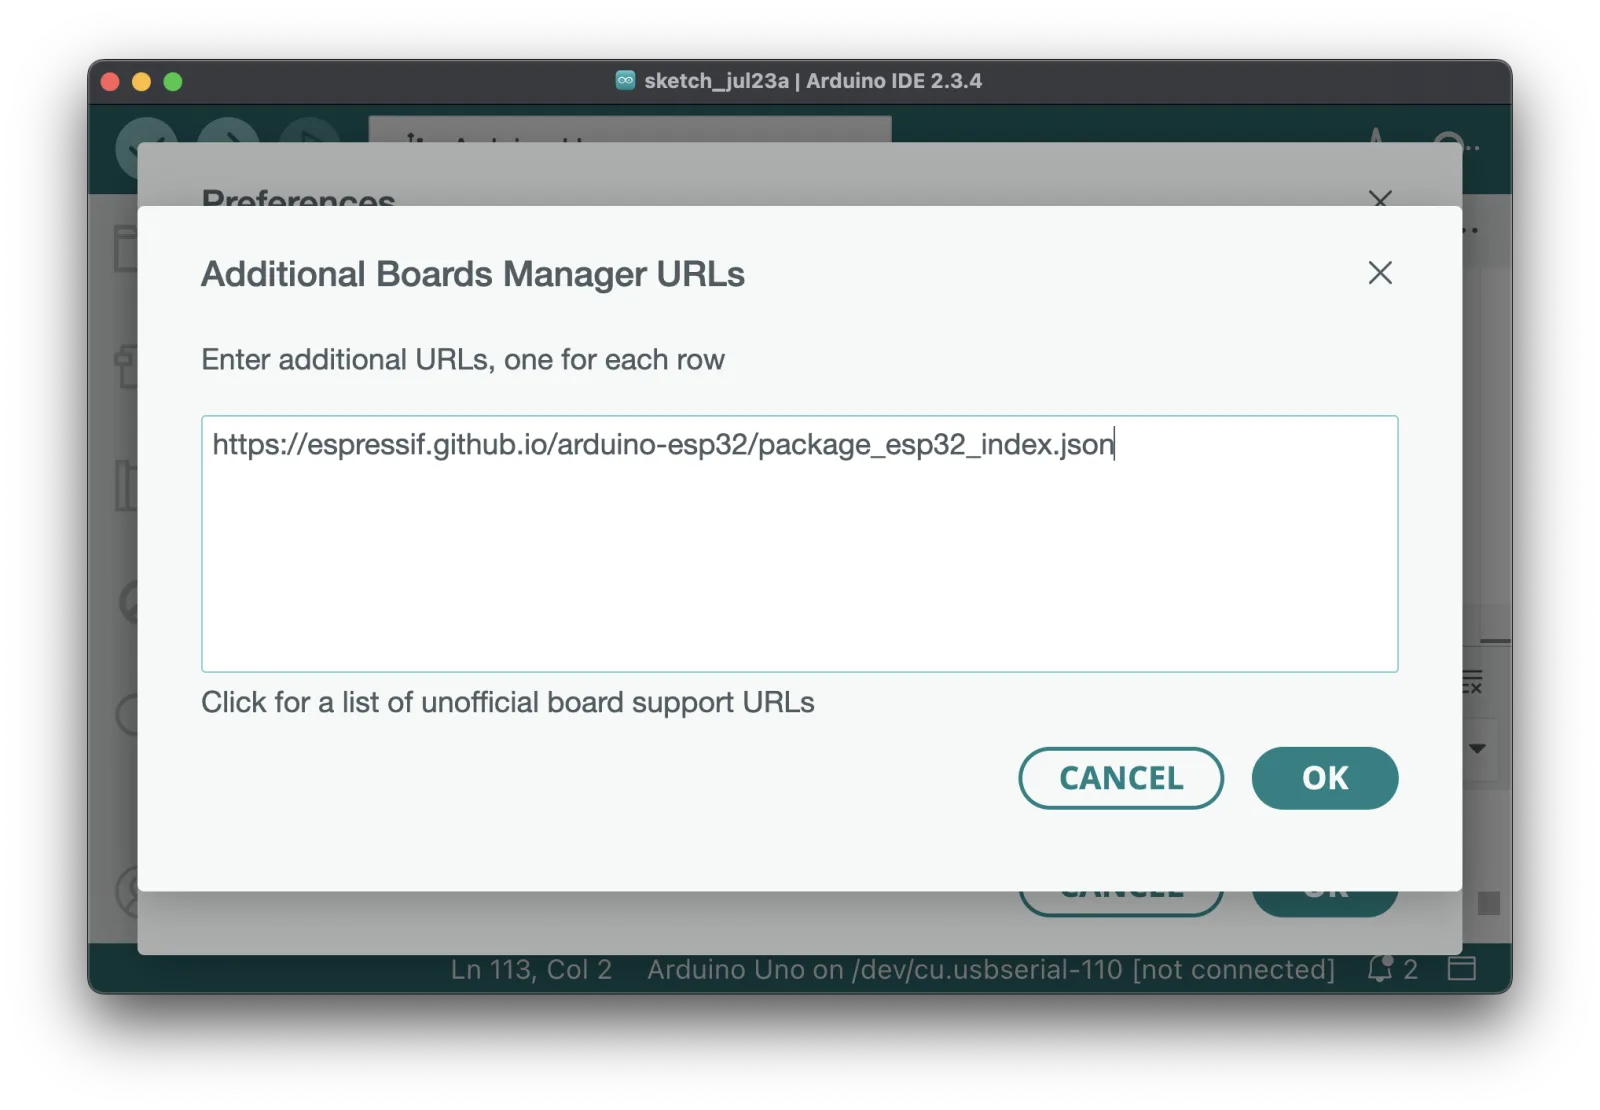
One URL per line, and click OK rather than closing the window. The address in this capture is Espressif's GitHub Pages mirror; the one above is the same file on raw.githubusercontent.com, and either serves the index. -
Tools ▸ Board ▸ Boards Manager, search
esp32, and install esp32 by Espressif Systems. It is a few hundred megabytes and it takes a while.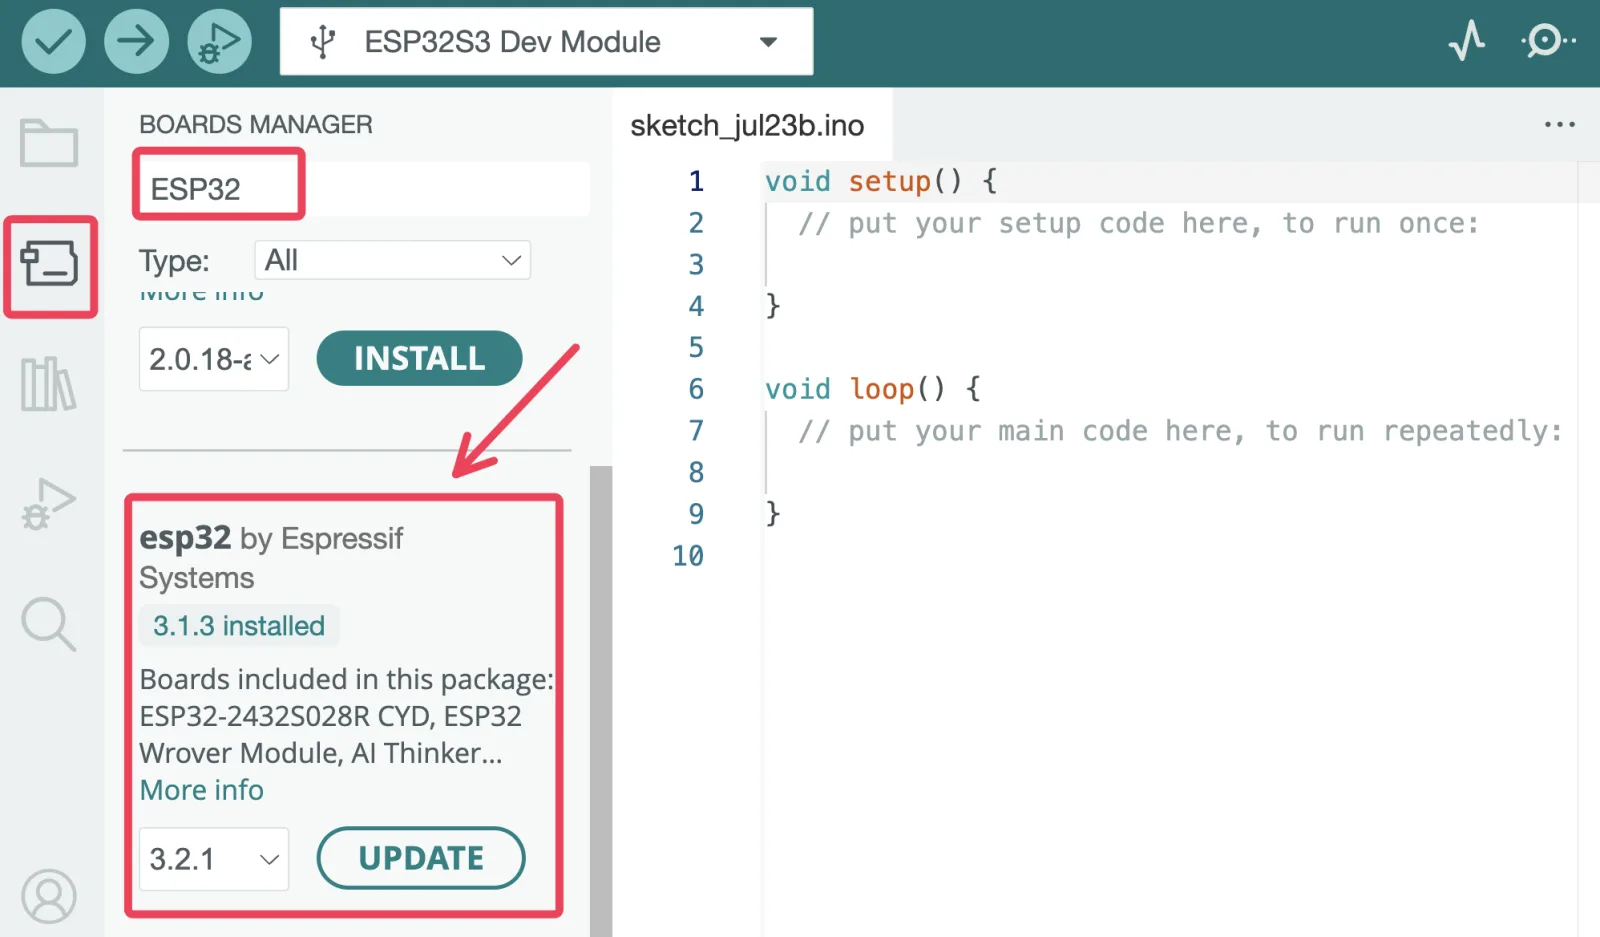
Take the one whose author is Espressif Systems. A search for esp32 returns several packages from other publishers, and every setting in this book assumes Espressif's. -
Tools ▸ Board ▸ ESP32 Arduino ▸ ESP32S3 Dev Module.
There is no entry named after this board, and there does not need to be. ESP32S3 Dev Module is the generic S3 board, and the eight rows below are how you describe your particular one to it.
The eight rows
This is the part that matters. Pick the socket your cable is in, then look at what each row is protecting you from:
Written out, for copying:
| Tools row | Set it to |
|---|---|
| Board | ESP32S3 Dev Module |
| USB CDC On Boot | Enabled for the USB socket, Disabled for the UART socket |
| Flash Size | 16MB (128Mb) |
| Flash Mode | QIO 80MHz |
| Partition Scheme | 16M Flash (3MB APP/9.9MB FATFS) |
| PSRAM | OPI PSRAM |
| Upload Mode | UART0 / Hardware CDC |
| USB Mode | Hardware CDC and JTAG |
Set, the menu reads like this — and this is what to compare yours against when a sketch behaves as though it is on a smaller board:
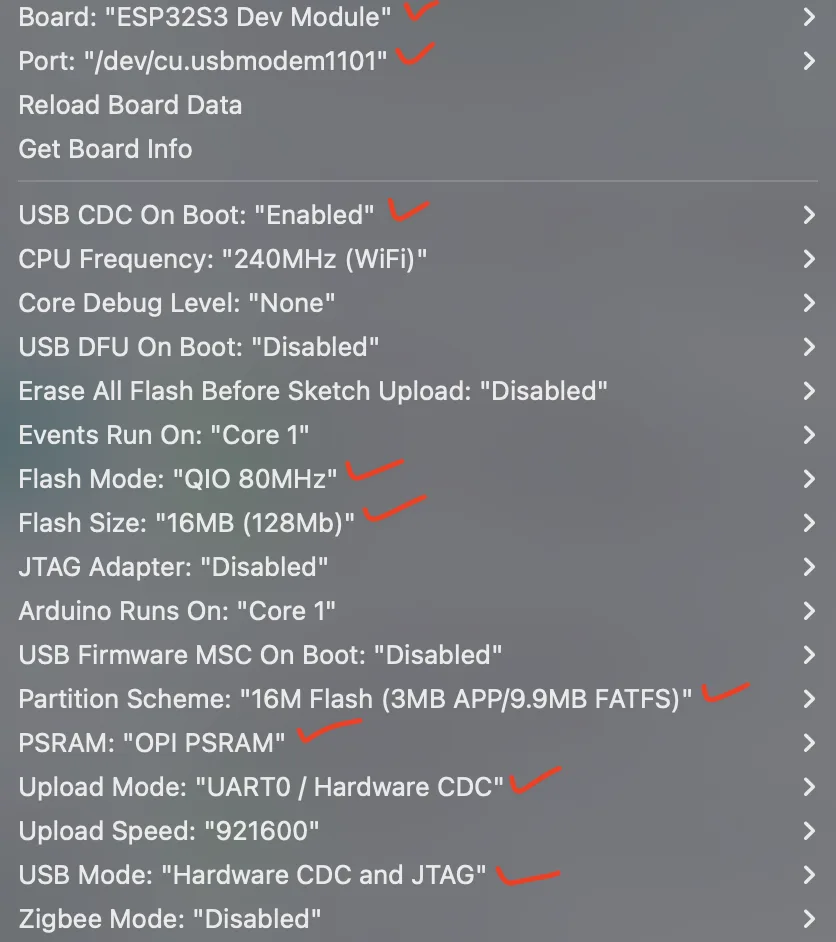
Three of them earn their place:
- Flash Size and Partition Scheme together decide how much of the chip your sketch can reach. Left at the 4 MB defaults, twelve of your sixteen megabytes are unaddressable. Nothing errors — it simply describes a smaller chip than the one you own.
- PSRAM must be OPI. The 8 MB on an N16R8 is octal-interface, so any
other value finds nothing at all and
ESP.getPsramSize()returns zero on a board that has eight megabytes of it. - USB CDC On Boot is the only row that depends on a physical choice you made earlier, and it is the one that produces the most confusing failure: an upload that works perfectly and a Serial Monitor that stays blank.
Pick the port and upload
Tools ▸ Port, and take the entry that appears when you plug the board in. Do not memorise the name: it belongs to your computer's driver, so it changes with the socket you used.
The board drop-down's Select other board and port dialog sets both at once, which is the quickest route if the port list is crowded:
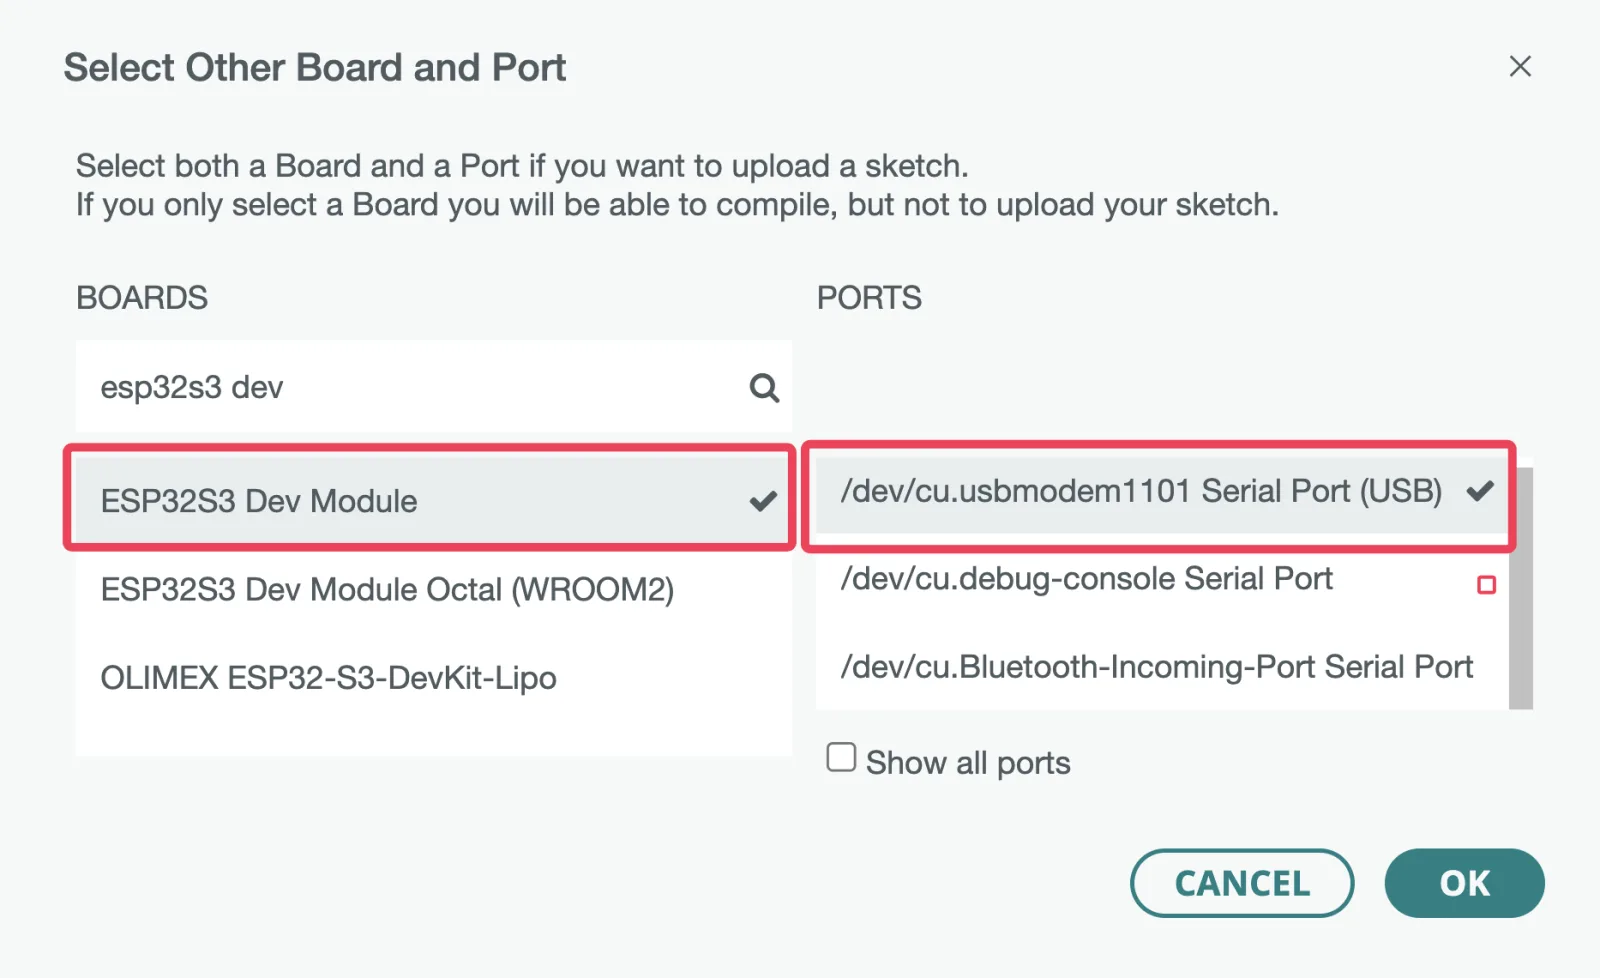
Then upload the sketch below, open Tools ▸ Serial Monitor, set it to 115200, and press RESET on the board.
Two lines should appear, and the second is the one to read. If it says
flash 16 MB, psram 8 MB, every setting above took, and the rest of this book
is downhill. If it says 4 and 0, go back to the table — nothing is wrong with
the board.
The code
The smallest sketch that proves the whole chain — IDE, package, port, upload and Serial Monitor — is working. Upload it, open the Serial Monitor at 115200, and press RESET.
/*  Lonely Binary ESP32-S3 N16R8
    Tools ▸  Board            ESP32S3 Dev Module
             USB CDC On Boot  Enabled   (Disabled for the UART socket)
             Flash Size       16MB (128Mb)
             Flash Mode       QIO 80MHz
             Partition Scheme 16M Flash (3MB APP/9.9MB FATFS)
             PSRAM            OPI PSRAM
             Upload Mode      UART0 / Hardware CDC
             USB Mode         Hardware CDC and JTAG          */

void setup() {
  Serial.begin(115200);
  delay(1500);            // give the native USB port time to enrol

  Serial.println("ESP32-S3 awake");
  Serial.printf("flash %u MB, psram %u MB\n",
                ESP.getFlashChipSize() / (1024 * 1024),
                ESP.getPsramSize() / (1024 * 1024));
}

void loop() {
  delay(1000);
}
The settings block at the top is not decoration. Board settings are stored per board and not per sketch, so a sketch that travels between machines carries none of them — writing them in the file is how the next person gets them.
When it does not work
The extra URL did not save. Reopen Preferences and check it is on its own line, with no trailing spaces, and that you clicked OK rather than closing the window. Then close and reopen the Boards Manager — it caches the index.
It is a large download and a proxy or a flaky connection will stop it. Run it again; it resumes rather than starting over. On a corporate network, the tool cache is often the thing being blocked, not the IDE.
Both numbers are settings, not hardware. Flash Size and Partition Scheme are still at their 4 MB defaults, and PSRAM is not set to OPI. Fix those three rows and upload again — the memory article walks through what each one does.
USB CDC On Boot does not match the socket your cable is in. Enabled for the right-hand USB socket, Disabled for the left-hand UART one, and you have to upload again after changing it because it is compiled into the sketch.
One LED, one pin, and a library — because the LED on this board is not the kind digitalWrite can light.
Blink the RGB LED →Edit this page — content/boards/esp32-s3/arduino-ide-setup.mdx
Questions about this product
See what other owners have asked, and read their solutions.
ESP32-S3 Gold Edition (N16R8)
Loading discussions…
Discuss this article
Ask about this page. The answer stays here, on the page it belongs to, for whoever hits the same wall next.