PlatformIO
The same eight decisions you made in the Tools menu, written into a file that travels with the project. Same board, same Arduino code, and nobody has to be told the settings.
Why bother, once the IDE works
Because the eight settings are not in the sketch. They live in the Arduino IDE's preferences, attached to a board rather than to a project — so a sketch you send somebody arrives with none of them, and a machine you set up in six months starts from the same blank menu.
PlatformIO puts them in a file called platformio.ini, next to the code, in the
repository. That is the whole argument. The code stays Arduino code; setup and
loop and every library you already use keep working.
The file, line by line
Each line here is one row of the Tools menu you already filled in.
Two entries in that list have no menu equivalent and are worth knowing anyway.
CORE_DEBUG_LEVEL turns on the core's own logging — 3 is informative without
being a flood, 5 is everything, 0 is silence. BOARD_HAS_PSRAM is the flag that
tells the Arduino core to offer PSRAM to the allocator; without it the memory is
initialised and nothing uses it.
Getting set up
-
Install VS Code, then the PlatformIO IDE extension from the Extensions view. It downloads PlatformIO Core on first run, which takes a few minutes.
-
PIO Home ▸ New Project. Name it, pick Espressif ESP32-S3-DevKitC-1, framework Arduino, and Finish.
-
Replace the generated
platformio.iniwith the one below. -
Put your code in
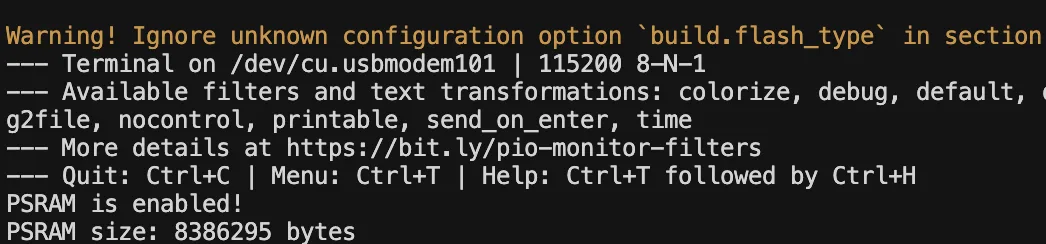
src/main.cpp. It is an Arduino sketch with one extra line at the top:#include <Arduino.h> void setup() { Serial.begin(115200); delay(1500); Serial.printf("psram %u bytes\n", ESP.getPsramSize()); } void loop() { delay(1000); }.inofiles hide that include;.cppfiles do not. That is the only change most sketches need. -
Build and upload with the arrow in the status bar, then open the monitor with the plug icon beside it.
Name your ports
On a board with two sockets, this is worth adding the day you first plug both in:
upload_port  = /dev/cu.usbmodem101
monitor_port = /dev/cu.usbmodem101
Without them PlatformIO picks whichever serial device it finds first, which on a desk with a second board plugged in is a genuine coin toss — and the failure is an upload that goes somewhere else entirely.
Two environments, one file
The real reward comes when you stop choosing. A single file can describe both sockets, and you build whichever you want:
[env]
platform  = espressif32
board     = esp32-s3-devkitc-1
framework = arduino
monitor_speed = 115200
board_upload.flash_size = 16MB
board_build.partitions  = default_16MB.csv
board_build.arduino.memory_type = qio_opi
build_flags = -D BOARD_HAS_PSRAM

[env:usb]
build_flags = ${env.build_flags} -D ARDUINO_USB_MODE=1 -D ARDUINO_USB_CDC_ON_BOOT=1

[env:uart]
build_flags = ${env.build_flags}
pio run -e usb -t upload for the right-hand socket, -e uart for the left.
The setting that caused every silent Serial Monitor in this book is now a
command-line flag, and you can prove which one you built.
The code
A complete file for this board, using the right-hand USB socket. Delete the last two lines to use the left-hand UART socket instead.
[env:esp32-s3-devkitc-1]
platform  = espressif32
board     = esp32-s3-devkitc-1
framework = arduino

monitor_speed = 115200
upload_speed  = 921600

; 16 MB of flash, described as 16 MB — the two halves of the IDE's
; Flash Size and Partition Scheme rows.
board_upload.flash_size    = 16MB
board_build.flash_mode     = qio
board_build.partitions     = default_16MB.csv

; N16R8: quad-interface flash, octal-interface PSRAM.
board_build.arduino.memory_type = qio_opi

build_flags =
  -D BOARD_HAS_PSRAM
  -D CORE_DEBUG_LEVEL=3
  -D ARDUINO_USB_MODE=1
  -D ARDUINO_USB_CDC_ON_BOOT=1
default_16MB.csv ships with the Arduino core, so there is nothing to download. If you want the same 3 MB app / 9.9 MB FATFS split the IDE offers, put your own CSV beside platformio.ini and name it here.
When it does not work
Two lines do that job here and both are needed — board_build.arduino.memory_type = qio_opi, and -D BOARD_HAS_PSRAM in build_flags. The first initialises it, the second tells the Arduino core it exists.
The same failure as in the IDE, spelled differently. -D ARDUINO_USB_CDC_ON_BOOT=1 sends Serial out of the right-hand socket; without it, output goes to UART0 and the left-hand one. And upload_port and monitor_port both default to whatever PlatformIO finds first, which on a board with two sockets plugged in is a coin toss — name them.
That file comes with the Arduino core, so a first build that has not finished downloading the platform has not got it yet. Let the platform install finish. A custom CSV of your own goes beside platformio.ini and is named the same way.
Drop upload_speed to 115200 before anything else. PlatformIO defaults faster than the IDE does, and a marginal cable shows up here first.
The board works and the toolchain is yours. Everything after this — Wi-Fi, BLE, the buses, deep sleep, OTA — is written once for the whole family, next door.
The ESP32 book →Edit this page — content/boards/esp32-s3/platformio.mdx
Questions about this product
See what other owners have asked, and read their solutions.
ESP32-S3 Gold Edition (N16R8)
Loading discussions…
Discuss this article
Ask about this page. The answer stays here, on the page it belongs to, for whoever hits the same wall next.