The four pins
Four pins, of which you wire two: GND and SIG. There is no supply pin, because the block takes no power. The voltage it measures goes on the screw terminal, and SIG hands your board a fifth of it.
What is on the board
Four parts. A green two-way screw terminal at the top, two small resistors under it, and a four-pin header along the bottom edge. The header is right-angled, so its pins point out past the edge of the board and the board lies flat.
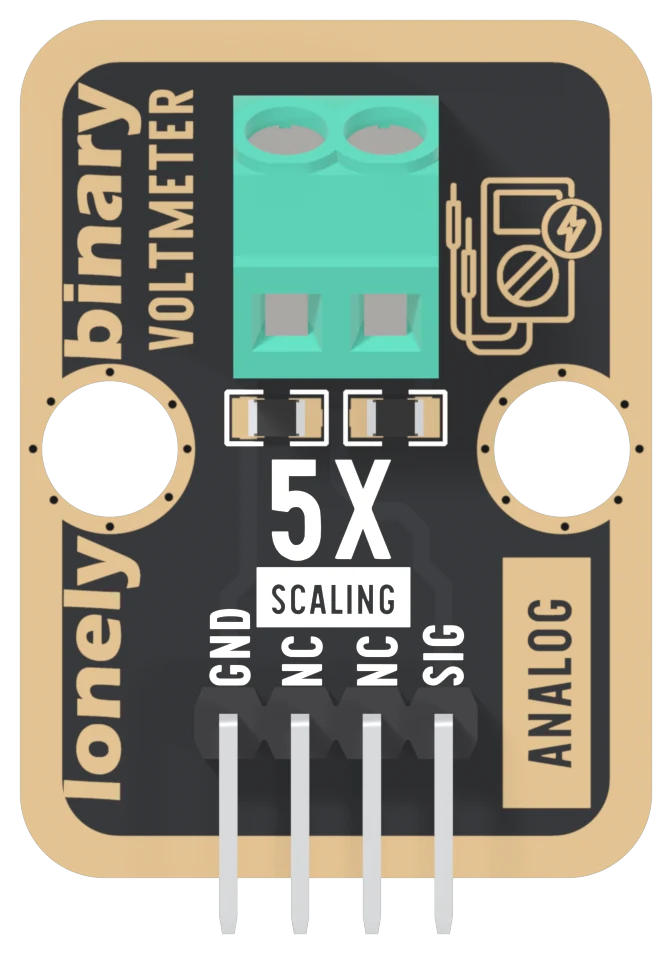
The two resistors are the whole circuit: 30 kΩ and 7.5 kΩ in series between the terminal's two screws. SIG comes from the point between them. The front says 5X SCALING because that is what they do: whatever is on the terminal arrives at SIG divided by five.
The four names
GND is on the square pad. It is joined on the board to the terminal's left screw and to the bottom of the divider, so wiring it to your board joins your board's ground to the ground of whatever you measure.
NC means not connected, and here it means it literally: the net list, the list of every electrical connection on the board, does not mention either NC pin. Other blocks put their VCC in one of these positions. This one has no supply to take.
SIG is the divider's middle, and it goes to an analog input. Your board reads a voltage there between 0 V and its own supply, and your sketch multiplies it by five.
There is no supply pin
Most blocks need power. This one is two resistors, and the voltage you are measuring is what pushes current through them. Nothing on the board needs 3.3 V or 5 V to work, so there is no pin for it.
That has one consequence worth knowing now. The block cannot protect your board. It divides whatever it is given, so 30 V on the terminal is 6 V on SIG, more than any of these boards may take. How high you can go works out the limit for each board.
The back of the board
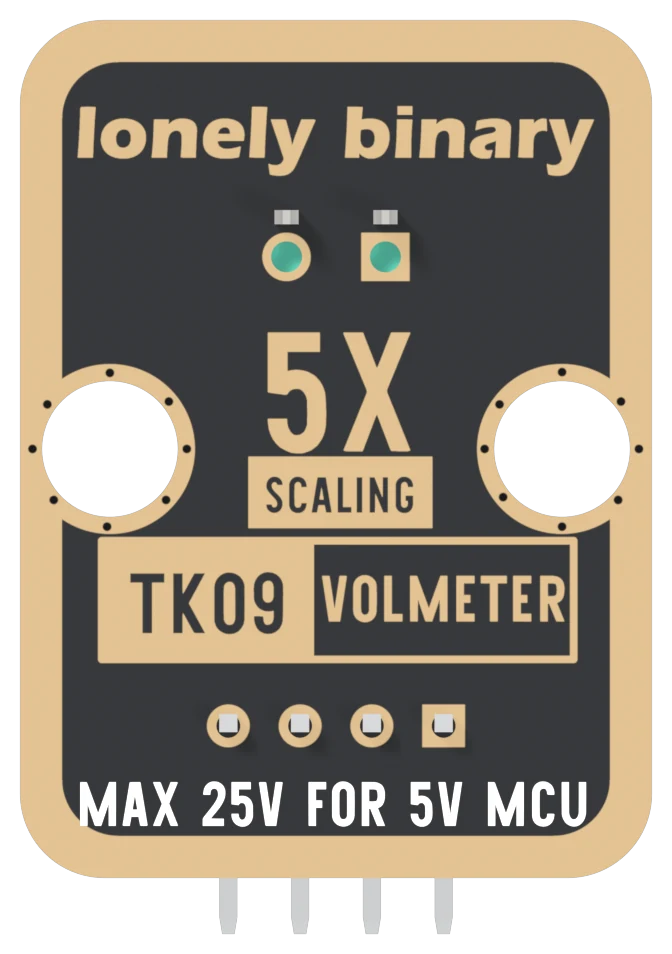
Turned over, the order reverses: the square pad is on the right, and it is still GND. The back prints the part number, TK09, and the one limit the board states: MAX 25V FOR 5V MCU. That is five times 5 V. On a 3.3 V board the limit is lower, and the board does not say so.
When it does not work
Hold the board with the terminal at the top and the header pins pointing down. Read GND, NC, NC, SIG from left to right. GND is also the square pad, which is the one mark that survives when the board is in a breadboard and the labels are hidden.
There isn't one. The net list has three nets and none is a supply: the block is two resistors, and the voltage you measure is what drives them. The two middle pins are NC. Wiring your board's 3V3 or 5V to either does nothing, and wiring the voltage you want to measure to the header is wrong: it goes on the screw terminal.
No. They are in no net at all, on either side of the board. They are there so every TinkerBlock block has the same four-pin header and the same cable fits all of them. A cable that carries VCC in one of those positions reaches no copper here.
It will not break anything, but it will not measure anything either. A digital pin reports HIGH or LOW, and the whole point of this block is the number in between. SIG goes to an analog input: A0 on an Uno, GPIO 34 on an ESP32, GPIO 4 on an ESP32-S3, GP26 on a Pico.
Nothing on the board marks plus and minus. The left screw is GND.
Which screw is which →Edit this page — content/books/voltmeter/the-four-pins.mdx
Questions about this product
See what other owners have asked, and read their solutions.
Voltmeter
Loading discussions…
Discuss this article
Ask about this page. The answer stays here, on the page it belongs to, for whoever hits the same wall next.