Specifications
| Type | Resistive moisture / steam sensor |
|---|---|
| Output | Analog |
| Supply voltage | 3.3 V or 5 V |
| Note | Traces corrode under continuous DC bias |
What it is
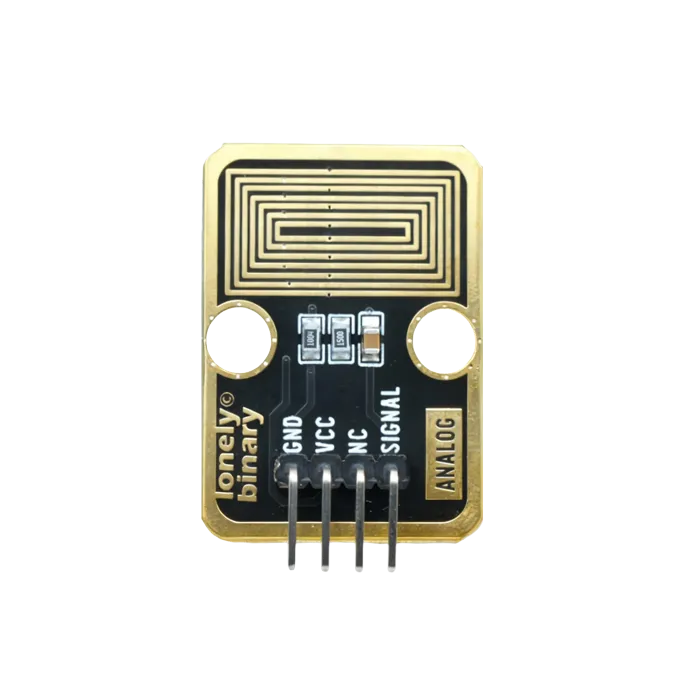
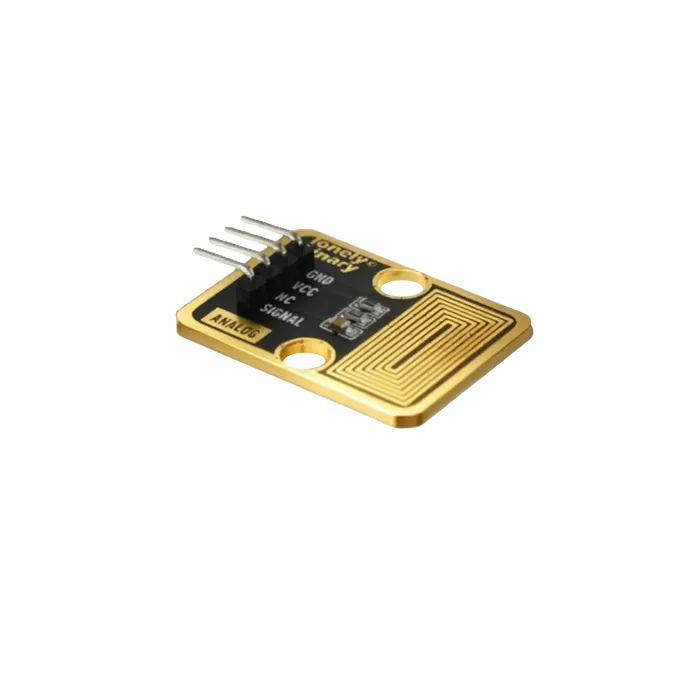
Two interleaved copper combs. Water bridges them, resistance falls, and the divider reports it.
The reading is not a unit and it is not stable. Conductivity depends on what is dissolved in the water as much as on how much there is, so tap water, rain and plant food all read differently. Treat it as a comparison against a baseline you took yourself, not as a measurement.
The failure mode is the important part. Continuous DC across the traces electrolyses them: the copper migrates and the sensor slowly eats itself. Left powered in soil it degrades in weeks. The fix is to power the sensor from a GPIO pin, turn it on, wait a few milliseconds, read, and turn it off again — duty cycling it down to a fraction of a percent extends its life enormously.
Capacitive soil sensors avoid the problem entirely and are worth the upgrade for anything permanent.
Pinout
- GND (negative): Like the negative terminal (-) of a battery, connect to the control board's GND
- VCC (positive): Like the positive terminal (+) of a battery, connect to the control board's 3.3V or 5V (this module supports both 3.3V and 5V)
- NC (no connection): No actual circuit connection, included for unified interface, can be left unconnected
- SIGNAL (signal output): Steam detection output pin, connect to the control board's digital pin (e.g. Arduino D2 or Pico GPIO 0)
- Outputs HIGH (HIGH/1) when steam detected
- Outputs LOW (LOW/0) when no steam detected
Wiring
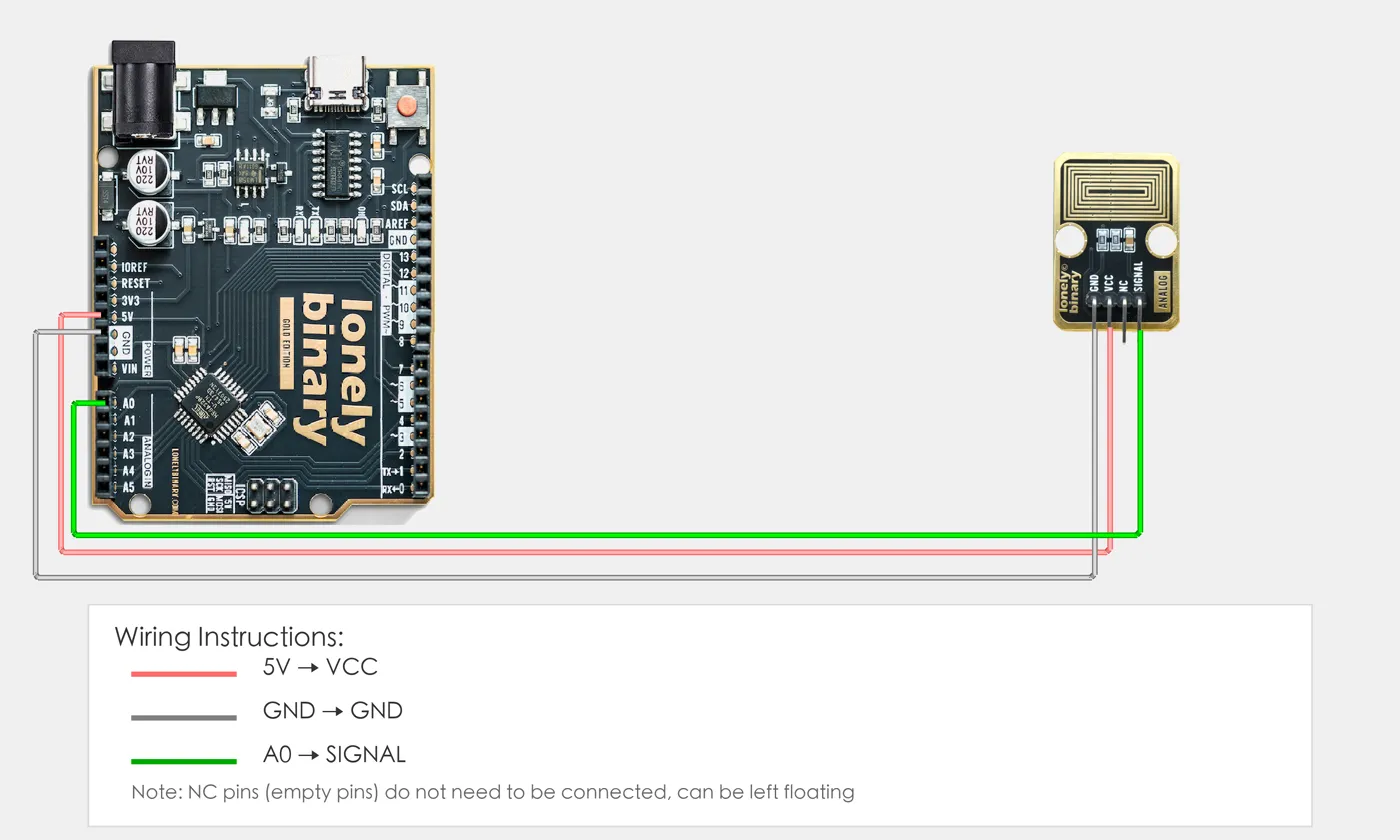
- GND → Control board GND
- VCC → Control board 3.3V or 5V
- SIGNAL → Control board digital pin (use the pin defined in your program)
Example
// Pin number: change this to match your wiring
#define STEAM_PIN A0   // Arduino analog input pin connected to SIGNAL (e.g. A0)

// Filtering and change detection variables
int lastValue = -1;  // Previous value
const int CHANGE_THRESHOLD = 10;  // Change threshold, only output if change exceeds this value

void setup() {
  // Start serial for debugging (9600 baud)
  Serial.begin(9600);

  Serial.println("Steam sensor program started");
  Serial.println("Reading analog value, higher value indicates higher steam concentration");
  Serial.println("Only output when value changes significantly (reduce noise interference)");
}

void loop() {
  // Multiple samples and average to reduce noise
  int sum = 0;
  for (int i = 0; i < 5; i++) {
    sum += analogRead(STEAM_PIN);
    delayMicroseconds(100);
  }
  int steamValue = sum / 5;  // Calculate average

  // Only output when value changes significantly (reduce random output in stable state)
  if (lastValue == -1) {
    // First reading, output directly
    Serial.print("Steam sensor value: ");
    Serial.println(steamValue);
    lastValue = steamValue;
  } else {
    // Calculate change amount
    int change = abs(steamValue - lastValue);
    if (change >= CHANGE_THRESHOLD) {
      Serial.print("Steam sensor value: ");
      Serial.print(steamValue);
      Serial.print(" (change: ");
      Serial.print(change);
      Serial.println(")");
      lastValue = steamValue;
    }
  }

  // Delay 200 milliseconds to avoid output too fast
  delay(200);
}# Import required modules
from machine import Pin, ADC # GPIO control and ADC
import time # For delay (time.sleep)
# Pin number: change this to match your wiring
STEAM_PIN = 26 # GPIO connected to SIGNAL (e.g. GPIO 26, must be ADC pin)
# Create ADC object
steam = ADC(Pin(STEAM_PIN)) # Set steam sensor pin as ADC mode (to read analog signal)
# Filtering and change detection variables
lastValue = -1 # Previous value
CHANGE_THRESHOLD = 100 # Change threshold, only output if change exceeds this value
print("Steam sensor program started")
print("Reading analog value, higher value indicates higher steam concentration")
print("Only output when value changes significantly (reduce noise interference)")
# Main loop: runs forever
while True:
# Multiple samples and average to reduce noise
sum_value = 0
for i in range(5):
sum_value += steam.read_u16()
time.sleep_us(100)
steamValue = sum_value // 5 # Calculate average
# Only output when value changes significantly (reduce random output in stable state)
if lastValue == -1:
# First reading, output directly
print(f"Steam sensor value: {steamValue}")
lastValue = steamValue
else:
# Calculate change amount
change = abs(steamValue - lastValue)
if change >= CHANGE_THRESHOLD:
print(f"Steam sensor value: {steamValue} (change: {change})")
lastValue = steamValue
# Delay 200 milliseconds to avoid output too fast
time.sleep_ms(200)When it doesn’t work
- The readings drift lower over days.
- The traces are corroding. Power the sensor from a GPIO pin and only turn it on for the few milliseconds you need.
- Two identical setups read differently.
- Water conductivity varies with what is in it. Baseline each sensor in its own conditions.
- It reads wet when it is dry.
- Residue on the traces from previous wettings. Clean it, and consider a capacitive sensor if this keeps happening.