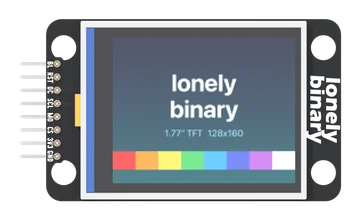
Specifications
| Type | Colour TFT LCD with its own backlight, driven over SPI. It holds the picture by itself between updates |
|---|---|
| Panel | 1.77 inches across the picture, sold as 1.8: 35.04 × 28.03 mm, 116 pixels to the inch |
| Resolution | 128 × 160 pixels; 160 across and 128 up with the header on the left. 16-bit colour (RGB565), 65,536 colours |
| Controller | Sitronix ST7735S. The board prints ST7735 128X160 |
| Interface | SPI, write-only: SCL (clock) and MOSI (data), plus CS, DC and RST. No MISO |
| Clock | Rated to about 15 MHz for writes (66 ns); libraries often run faster. A full frame is 40,960 bytes, at least 21.8 ms at 15 MHz |
| Supply | 3.3 V on 3V3. No regulator: 3V3 goes straight to the panel and the backlight |
| Logic | 3.3 V only. HIGH from 2.31 V; no input may exceed 3.6 V. A 5 V Uno goes through a TK97 logic level converter |
| Backlight | Switched by a BSS138 on BL, with 10 kΩ holding it off: dark until BL is HIGH. PWM on BL dims it |
| Jumpers | BL-3V3 (backlight always on) and CS-GND (always selected), both open as shipped |
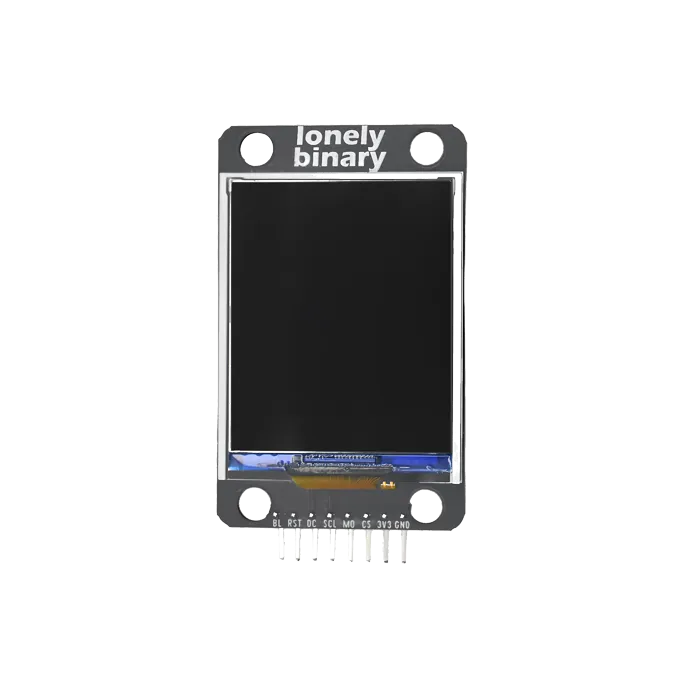
| Pins to wire | All 8: BL, RST, DC, SCL, MOSI, CS, 3V3 and GND |
| Header | 8-pin right-angle male, 2.54 mm pitch, on the short edge left of the screen. All pads round |
| Board | 56.7 × 35.0 mm, four 4.8 mm mounting holes. Board revision V3 |
| In the box | 1 × TK89 block. It also ships inside the TinkerBlock kits |
What it does
It shows a colour picture, 128 by 160 pixels, and keeps showing it until your board sends a change. The board sends pixels over SPI to the panel's controller, a Sitronix ST7735S, which holds them in its own memory and drives the glass. Your board only talks to it when something changes.
The board is sold as 1.8-inch and prints 1.8" TFT on the back; the panel's drawing measures the picture at 1.77 inches. It is the same glass. Behind it is only wiring: a 12-way socket for the panel's ribbon, a BSS138 transistor that switches the backlight, 10 µF and 100 nF across 3V3, and two solder jumpers.
The page this replaces said the board was 5 V tolerant on some boards, that the backlight was always on or PWM-controlled, and that it had 18-bit colour. None of that holds here: nothing on the board protects the controller from 5 V, the backlight is off until BL is HIGH, and the libraries send 16-bit colour.
Three things to know before wiring
- 3.3 V only. 3V3 goes straight to the panel, and so does every signal. An ESP32, an ESP32-S3 or a Pico wires straight across; an Uno goes through a TK97.
- The backlight waits for BL. Wire BL to an output and set it HIGH first, or the screen stays black however well the rest works.
- SCL is the SPI clock, not I2C: your board's SCK.
Wiring, in four lines
- 3V3 to 3V3, GND to GND.
- SCL and MO to your board's SPI clock and data out: GPIO 12 and 11 on an ESP32-S3, GPIO 18 and 23 on an ESP32, GP18 and GP19 on a Pico, D13 and D11 on an Uno through a TK97.
- CS, DC and RST to any three outputs: GPIO 10, 2 and 42 on an ESP32-S3, GPIO 15, 2 and 4 on an ESP32, GP5, GP4 and GP3 on a Pico, D10, D9 and D8 on an Uno.
- BL to one more output, set HIGH: GPIO 41, GPIO 32, GP2 or D7.
Then Adafruit's ST7735 library, initR(INITR_BLACKTAB) and
fillScreen().
Where to start
The handbook below is ten short articles, each with a working figure. First light is the whole build: it lights the backlight, fills the screen with named colours and tells you which setting to change if a name lands on the wrong one. Redraw only what changed is a dashboard that never flickers.
For the board, read the eight pins and the backlight waits for BL. If the screen is white, black or the wrong colour, when the screen is wrong.
When it doesn’t work
- The screen is black. Is it dead?
- Probably not. The backlight stays off until BL is driven HIGH: a 10 kΩ resistor on the board holds it off. Wire BL to an output pin and set it HIGH first thing in setup(), or bridge the BL-3V3 jumper on the back.
- The screen is white.
- The backlight works and the controller has not taken its setup. Check RST, DC, SCL and MOSI, and that the sketch's pin numbers match your wiring. SCL is the SPI clock, not I2C.
- Can I use it with an Arduino Uno?
- Through a TK97 logic level converter, as the back of the board says. The Uno's 5 V HIGH is 1.4 V over what the controller's inputs are rated for, and nothing on this board is in between.
- Is it 1.8 or 1.77 inches?
- The same glass. The picture's diagonal is 44.9 mm, 1.77 inches, and displays are sold by that figure rounded to one decimal.
- The colours are wrong or inverted.
- That is a library setting, not wiring. Try tft.invertDisplay(true), then a different initR() tab: INITR_REDTAB swaps red and blue against INITR_BLACKTAB, INITR_GREENTAB also moves the picture two columns and one row. The last chapter of the handbook has the table.
- Updates flicker.
- The sketch is clearing the whole screen every time: 40,960 bytes, at least 21.8 ms at 15 MHz, with nothing on the glass meanwhile. Draw the parts that never change once, and paint new text over old with a background colour.